Me Made
  • Home
  • Blog
  • Contact
  • Links

Shoulder Placket Tutorial

8/15/2017

2 Comments

 
Picture
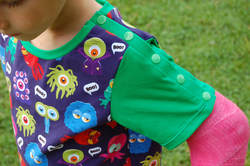
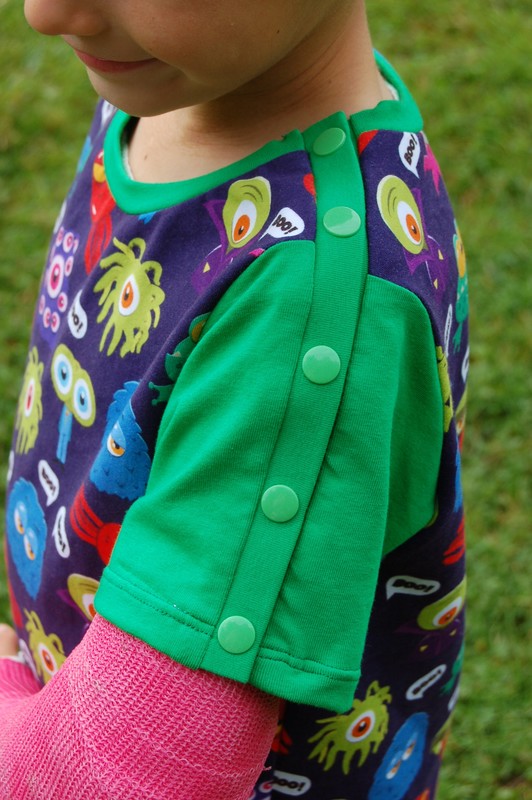
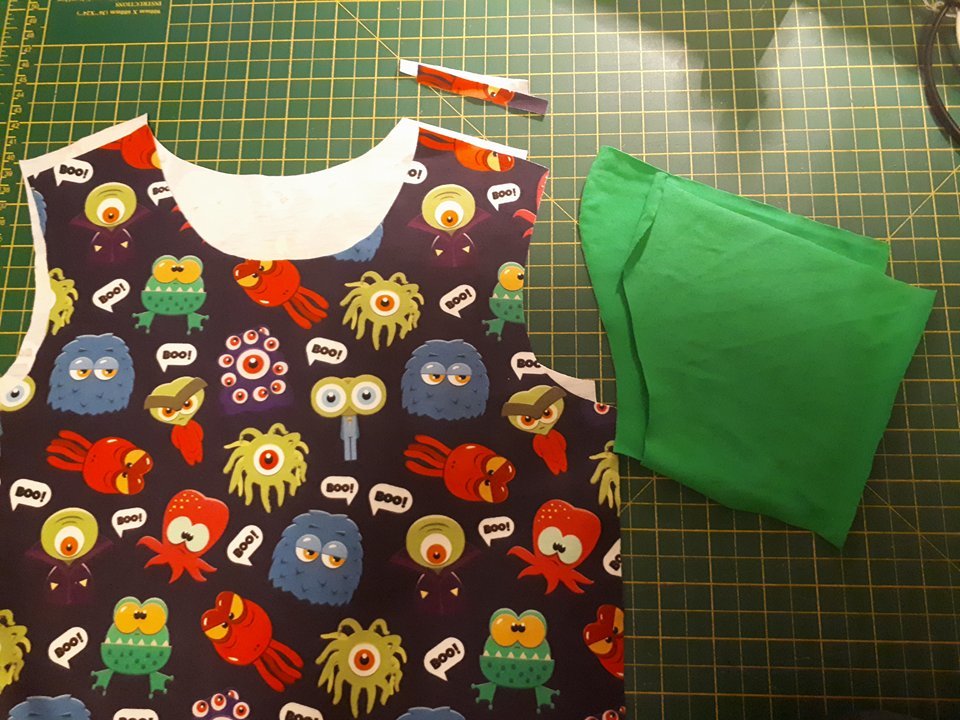
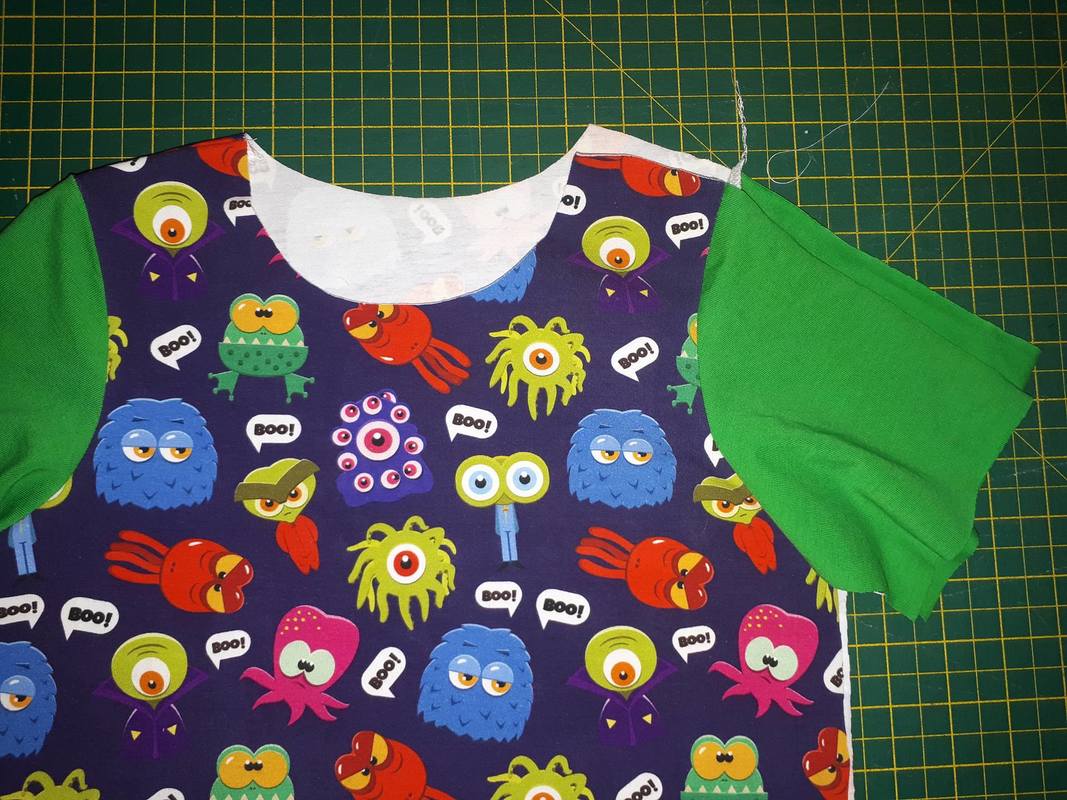
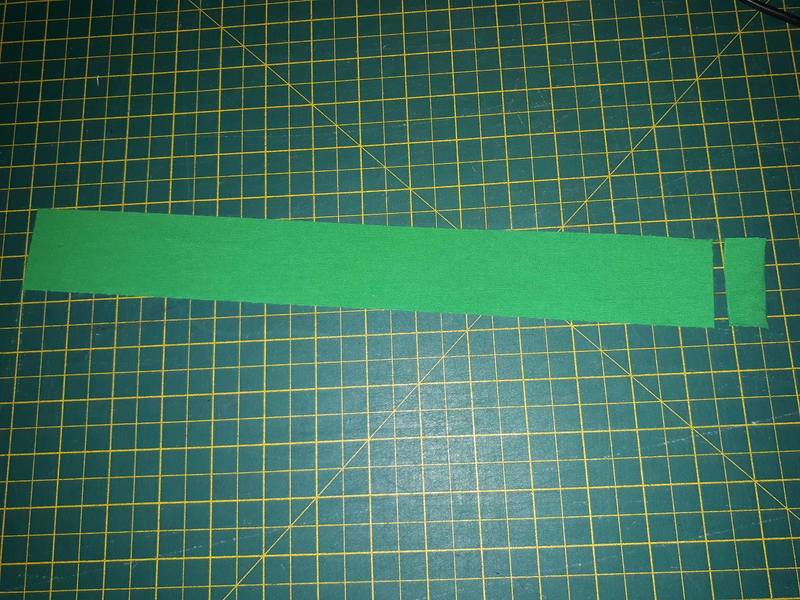
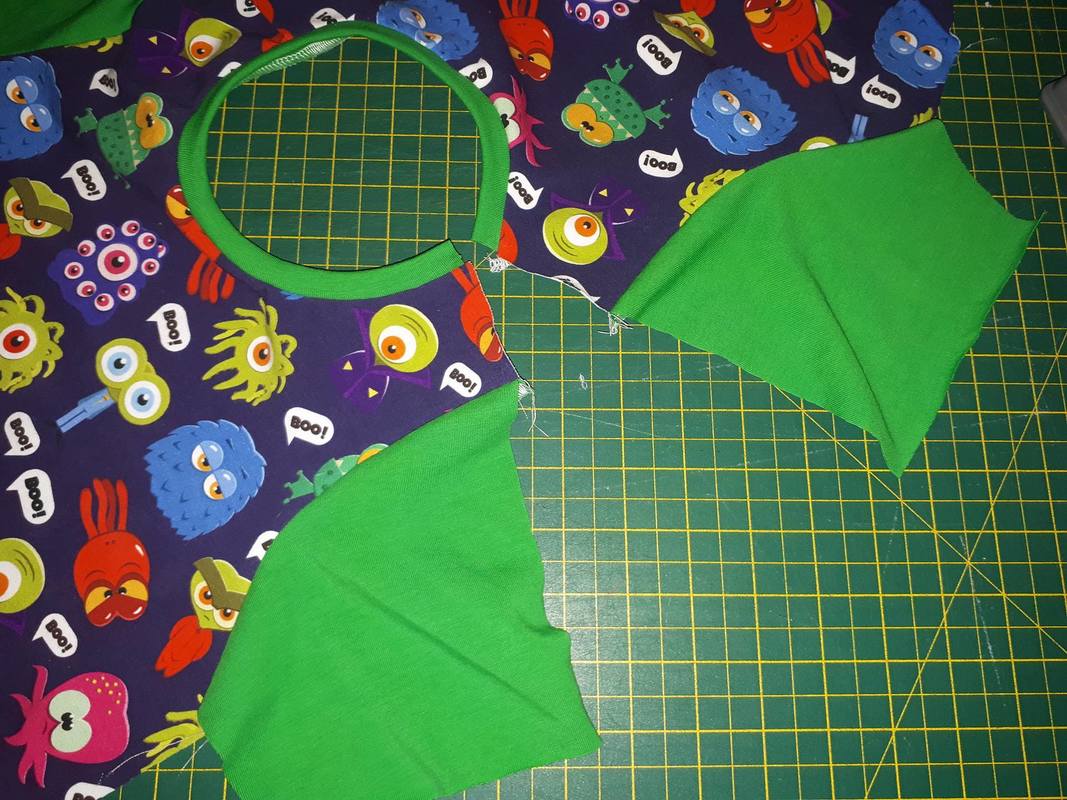
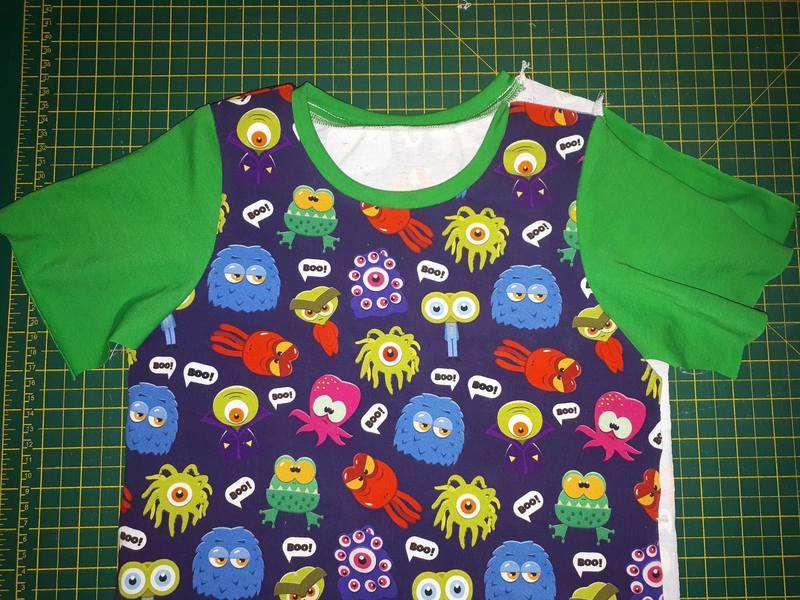
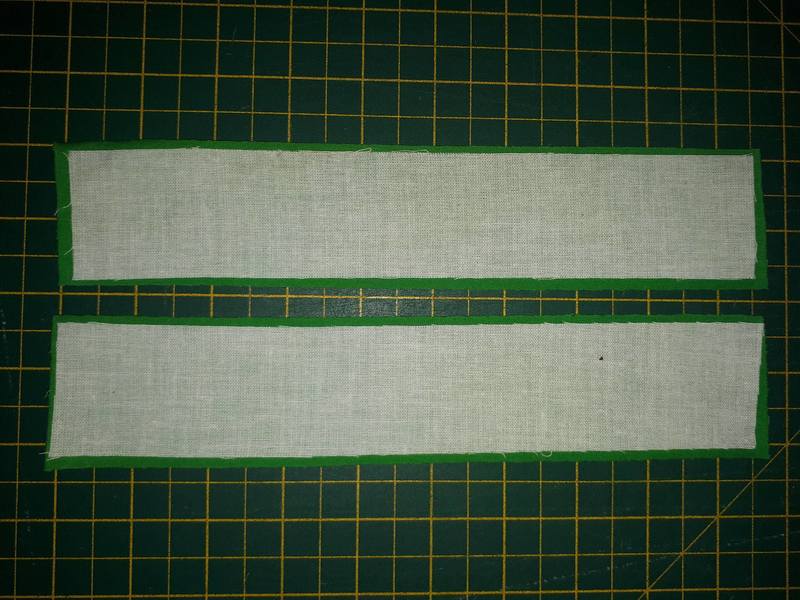
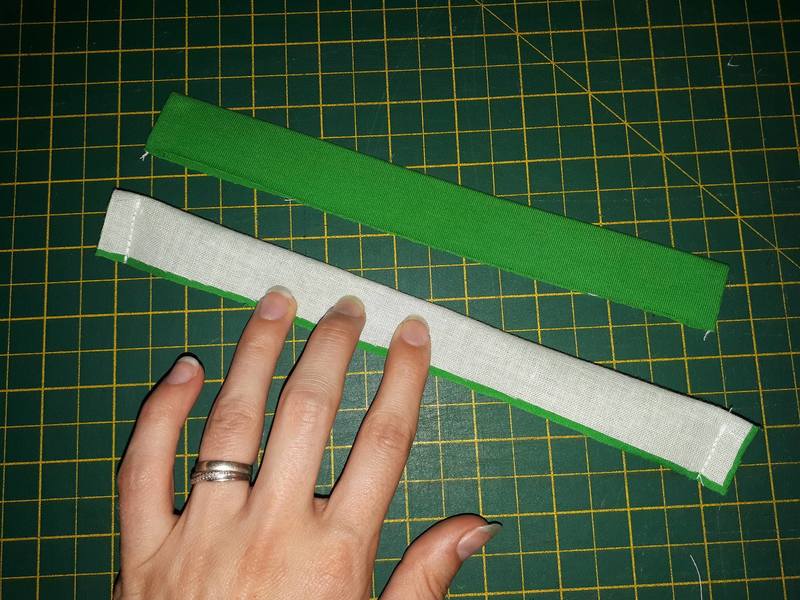
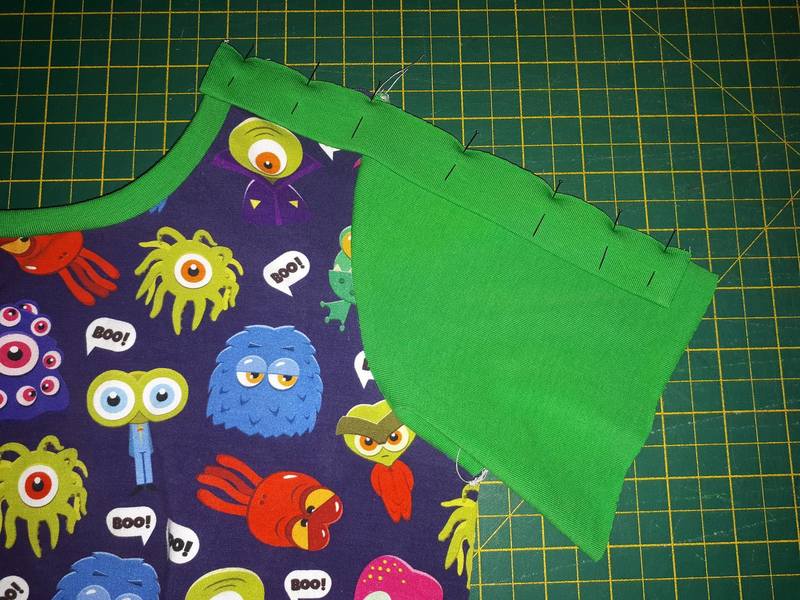
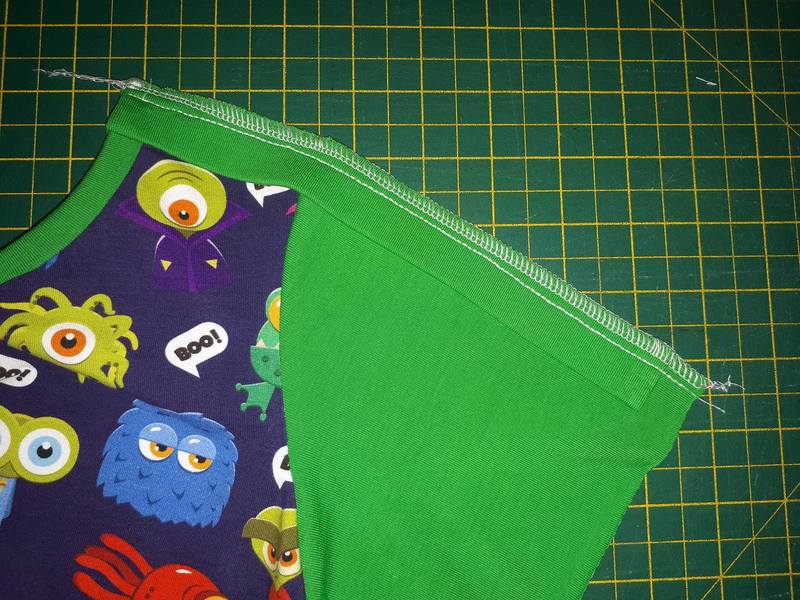
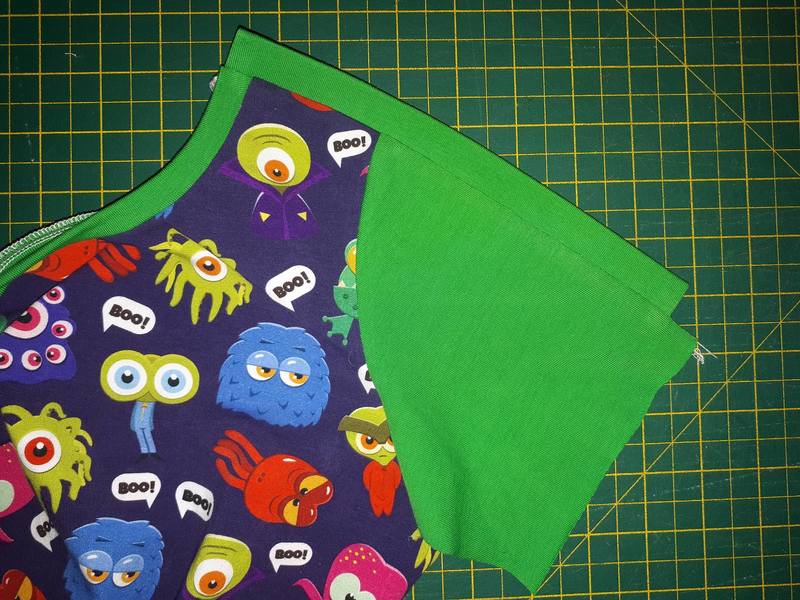
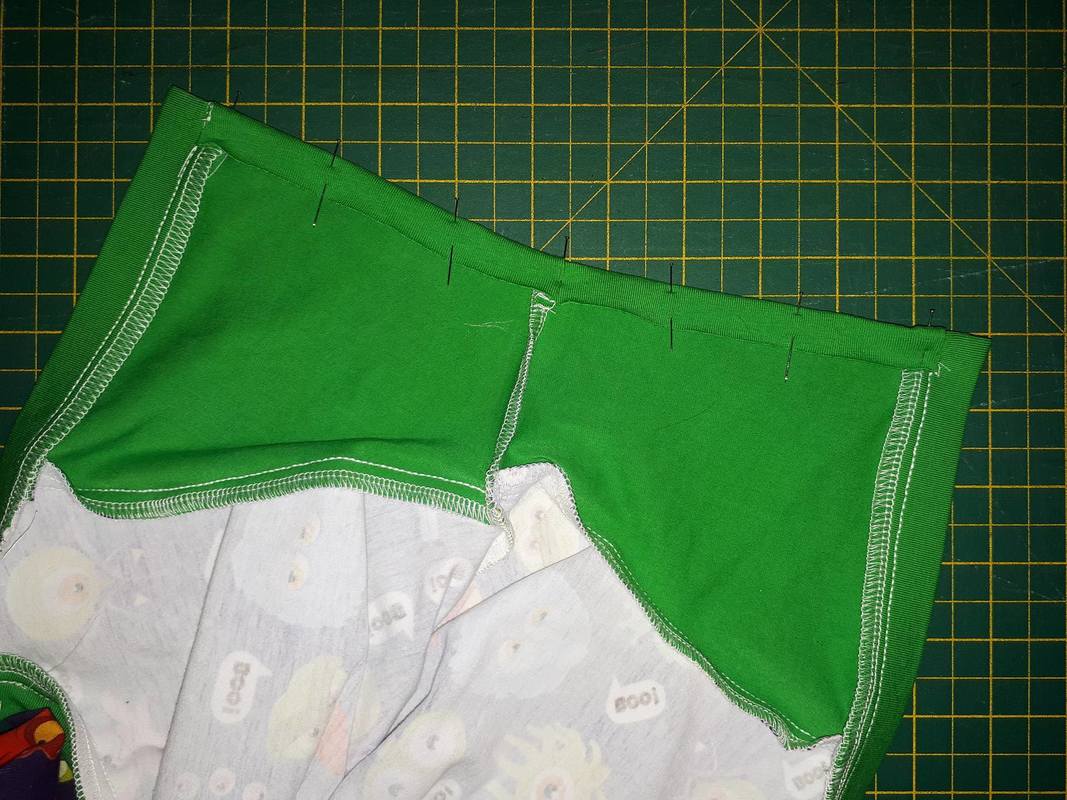
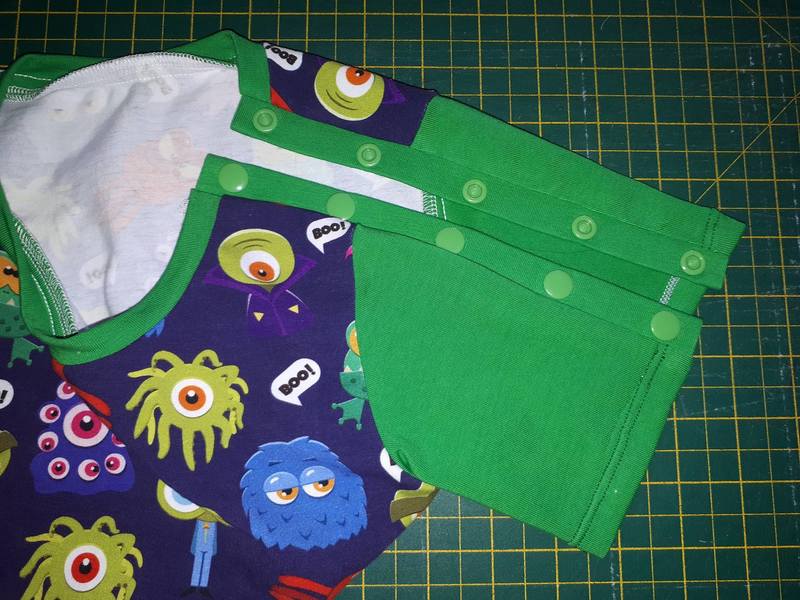
This Summer one of my sons broke his arm and needed it cast almost to his shoulder, this made getting tees on and off very tricky.  Inspired by the port access placket of the Pickle Toes Pattern Hope, I added a snap up placket to the shoulders of some of his tees.  I hope you never need it but I've put together a little tutorial for you just in case! A snap placket can either be done on ready made tees or as you are making a new one, this tutorial covers adding one to a new tee and I used the Pickle Toes Patterns Fried Pickles which is FREE with the code from their Facebook Group 

Picture
Picture
Picture
Picture
Picture
Picture
Picture
Picture
Picture
Picture
Picture
Picture


​Cut 1 Front, 1 Back, 1 sleeve on the fold.

Using the sleeve pattern piece move it half an inch away from the fold and cut around the piece completely, creating 2 mirrored half sleeves.

Cut the seam allowance (3/8" in this case) off the shoulder of the front and back pieces on the side you want the snap placket.


Sew the shoulder seam of the left hand side (RST)

Sew the full sleeve ont the left hand side as per the pattern 

Pin and sew the half sleeves to the right hand sides, matching shoulder and side seams


Cut the neckband piece as per the pattern and cut off the seam allowance x2 from 1 end (3/8" seam allowance here so 3/4" cut off)


​

Fold the neckband in half, pin and sew on as per the pattern instructions matching the raw edges to the raw edges of the shoulders.


​
Now you need to measure for the placket.  Measure from the folded edge of the neckband, across the raw edge of the shoulder and all the way to the end of the sleeve

Mine measured 9". Now you need to take off the sleeve hem allowance (mine was 1/2") and add on 2x seam allowances (I used 3/8") bringing the total length needed for mine to 9 1/4"  

Cut 2 of that length by 2" 


​

​​Interface both pieces


Fold lengthways, RST and sew each end with your seam allowance (3/8")

Trim, turn right way out and press

Repeat for 2nd piece


Pin and sew 1 placket to the front RST, aligning with the neckband.  It should be shorter than your sleeve by the amount of your sleeve hem


​
​Repeat for the back side too 


Flip placket backwards and press, topstitch if you choose


Fold Hem allowance under and hem


Hem other sleeve and bottom of tee


Add snaps to the plackets
​


You're done! Now it's easy to step into the tee and snap the arm hole closed!
​
Picture
I hope I've explained it well enough but I'm not very experienced in tutorials so please do ask in the comments below if you need something explained differently, I'm very friendly! 
2 Comments
Marianne link
8/15/2017 09:59:46 am

Superb tutorial! Thank you. What a lovely Mum you are. Such gorgeous happy fabrics too

Reply
Elizabeth R. Herbert
11/20/2017 11:25:26 pm

Thanks for this beautiful, Shoulder Placket Tutorial! Your instructions with the up-close images are so clear.you should use Brother Embroidery machines for sewing because it saves your time and also make high-quality designs. The best part is its use easy to use manually.
<a href=" https://www.digitemb.com/brother-machines.php / ">Brother Embroidery Machines</a>

Reply


Leave a Reply.

    Author

    Hi! I'm Sarah and I live with my 2 boys and my Husband in East Anglia, UK.  I enjoy sewing for my family and it is my aim to have a completely MeMade wardrobe for us all!

    Archives

    January 2019
    May 2018
    November 2017
    September 2017
    August 2017
    July 2017
    June 2017
    May 2017
    April 2017
    March 2017
    February 2017
    January 2017
    December 2016
    November 2016
    September 2016
    August 2016
    July 2016
    June 2016
    May 2016
    April 2016
    March 2016
    February 2016
    January 2016
    December 2015
    November 2015
    May 2015

    Categories

    All
    Accessory
    Autumn
    Baste+Gather
    Bella Sunshine Designs
    Bishy Barnababes
    Blogtour
    Blog Tour
    Boys
    Buttons
    Cardigan
    Children
    Coat
    Colour Blocking
    Costume
    Daddy & Me
    Denim
    Dress
    Dressing Up
    Duck Butt Designs
    EYMM
    Fabric
    Formal
    Girls
    Girs
    Gracious Threads
    Gym
    Hoodies
    Itch To Stitch
    Jacket
    Jalie
    Jeans
    Jersey
    Jersey Jollies
    JK Jersey
    Jumper
    Jumpsuit
    Kelly J Designs
    Ladies
    Laela Jeyne
    Lil Luxe Collection
    Little Finch
    Lounge Wear
    Love Notions
    Lulus Fabric UK
    Matching
    Maxi Dress
    MBJM
    MeMadeMay
    Mens
    Mummy & Me
    New Horizons
    NewLook
    Occasion Wear
    PDF
    Peek A Boo
    Peek-a-Boo
    Pickle Toes
    Pockets
    Pyjamas
    Rumpled Stitching
    Scuba
    Seamingly Smitten
    Separates
    Sew By Pattern Pieces
    Sew Straight & Gather
    Shirt
    Shorts
    Skirt
    Softshell
    Splashings Of Fabric
    Stitch Upon A Time
    Summer
    Swimwear
    Tee
    Terra's Treasure
    Thread Theory
    Tops
    Trousers
    Tutorial
    Underwear
    Upcycle
    Wardrobe By Me
    Women
    Work

    RSS Feed

    Affiliate Links

    Picture
    Picture
    Picture
    200x200
    Picture
    Picture
Powered by Create your own unique website with customizable templates.
  • Home
  • Blog
  • Contact
  • Links